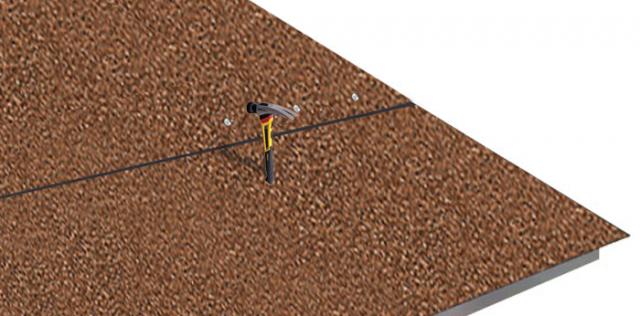
How To Install Rolled Roofing With Nails
How To Install Roll Roofing A Path Appears

How To Install Roll Roofing Do It Yourself Pj Fitzpatrick
How To Install Roll Roofing Lovetoknow
Asphalt Sbs Roll Roofing Installation Details How To Install Roll Roofing

How To Install A Rolled Roof Ryanhomedesign Co

How To Apply Roll Roofing Diy In A Hour

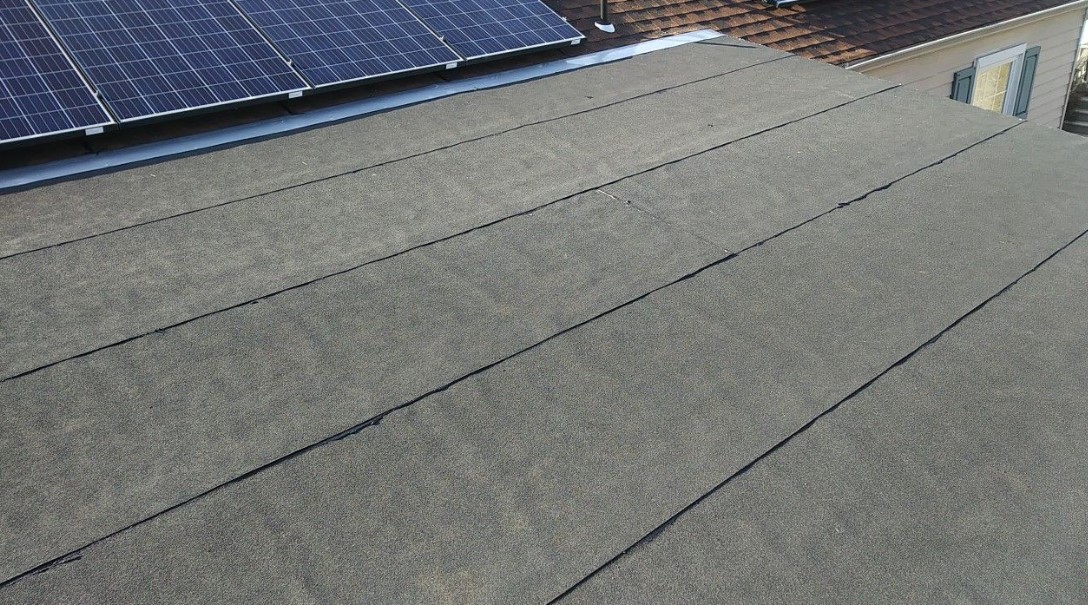
Nail down the 18 inch roll roofing sheet that it is covering the valley.
How to install rolled roofing with nails.

How To Install Rolled Roofing 4 Easy Steps Ezpzroofing Com

How To Install Roll Roofing With Your Own Hands Roll Roofing Shed Roof Felt Shed Roof

How To Install Roll Roofing With Your Own Hands Roll Roofing Flat Roof Repair Roofing

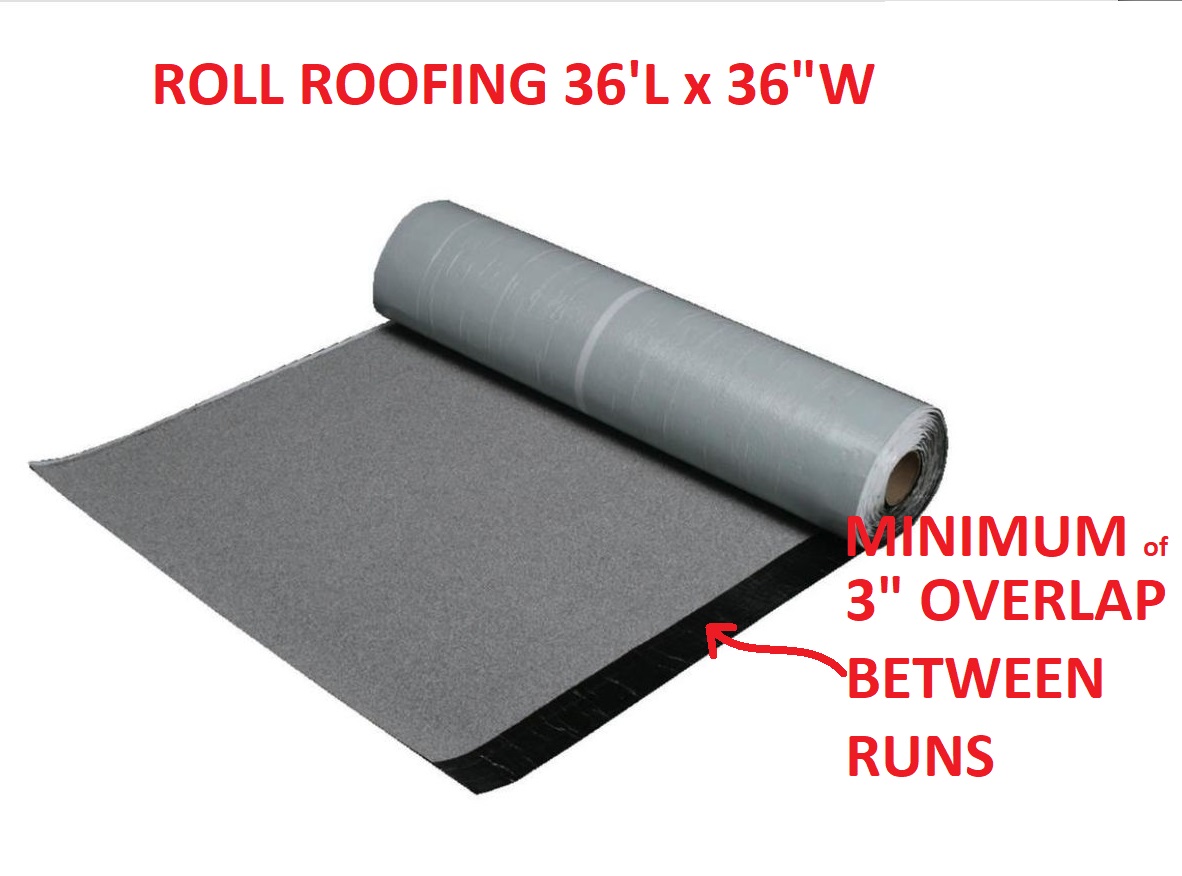
Install Roll Roofing With No Nails Doityourself Com
Source : pinterest.com
